
2.3.14.c How to Print Invoice and Dispatch Note?
In order to print invoice folllow the steps below.
Adding Product Tags
Adding Invoice Printer
Creating Invoice Printer Template
Adding Invoice Printing Job
Print Invoice Automation Command
Printing Job Action
Printing Invoice Rule
1-Adding Product Tags
When printing invoice it is necessary to split the products as Food Group, Drink Group, Alcoholic Drinks Group etc.
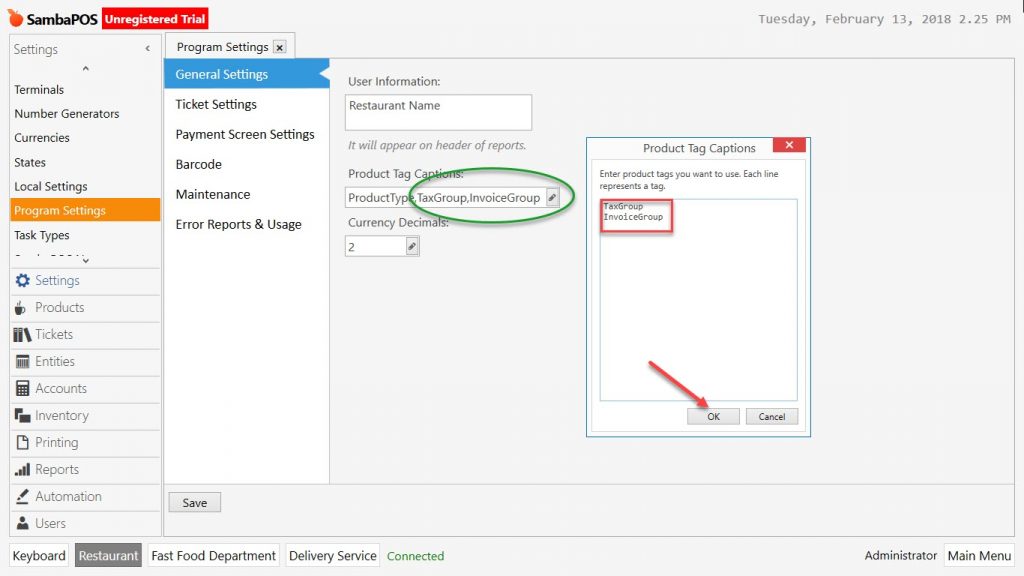
Go to Manage > Settings > Program Settings from here clik on Product Tag Captions in the window write headers of Invoice Groups.
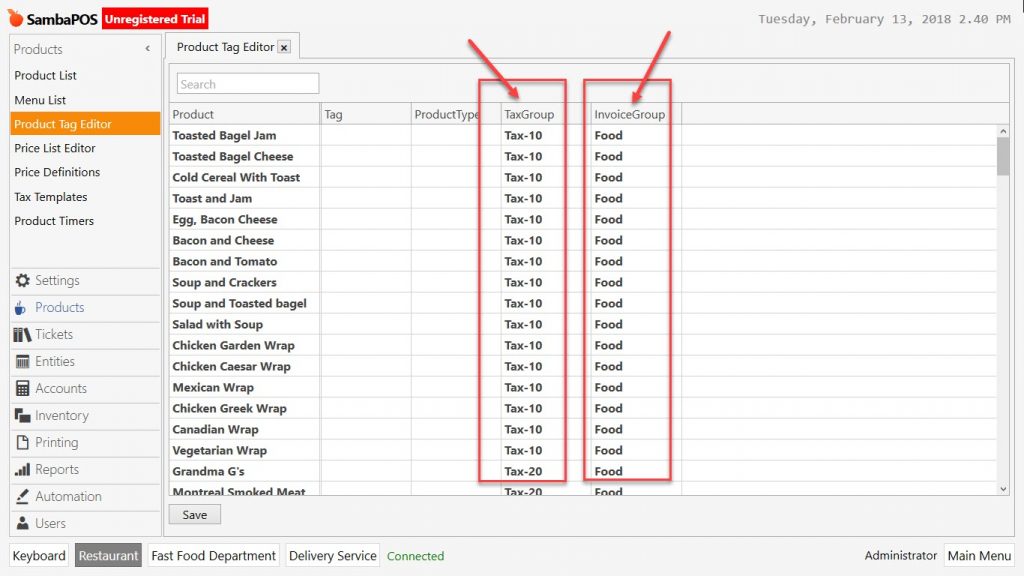
Go to Manage > Products > Product Tag Editor from here write the tags that will be printed on the invoice for all products, complete the process by selecting desired group and click on Save button.
2-Adding Invoice Printer
Manage > Printing > Printers from here click Add Printer link
3-Creating Invoice Printer Template
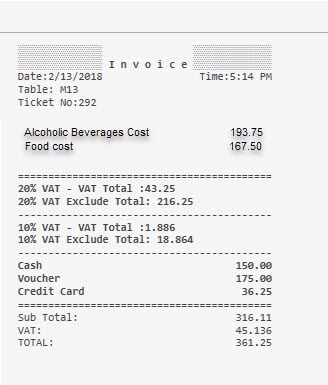
Manage > Printing > Printer Templates from here click on Add Printer Template link. Give a proper name to template and copy below rows into the template;
[LAYOUT]
-- General layout
<T>Invoice
<J00>Date:{TICKET DATE} | Time:{TIME}
{ENTITIES}
<L00>Ticket No:{TICKET NO}
<F>-
{ORDERS}
<F>=
<EB>
{DISCOUNTS}
{TAXES}
[<J10>Total Gift:|{ORDER STATE TOTAL:Gift}]
<J10>Sub Total:|[=F(TN('{TICKET TOTAL}')-TN('{TAX TOTAL}'))]
<J10>VAT:|{TAX TOTAL}
<J10>General Total:|{TICKET TOTAL}
{PAYMENTS}
<DB>
<F>=[DISCOUNTS]
<J00>{CALCULATION NAME} %{CALCULATION AMOUNT}|{CALCULATION TOTAL}[PAYMENTS]
<J00>{PAYMENT NAME}|{PAYMENT AMOUNT}[ORDERS GROUP|PRODUCT TAG:InvoiceGroup]
<J10>{GROUP KEY} Cost | {GROUP SUM}[ORDERS]
//(Blank leave - 1 character blank - Delete here in the template -)[ENTITIES:Table]
<L00>Table: {ENTITY NAME}[ENTITIES:Customer]
<J00>Customer: {ENTITY NAME} | {ENTITY DATA:Phone}[TAXES]
<L00>{TAX NAME} - VAT Total :{TAX AMOUNT}
<L00>{TAX NAME} Exclude Total: {TAXABLE AMOUNT}
<F>-4-Adding Invoice Printing Job
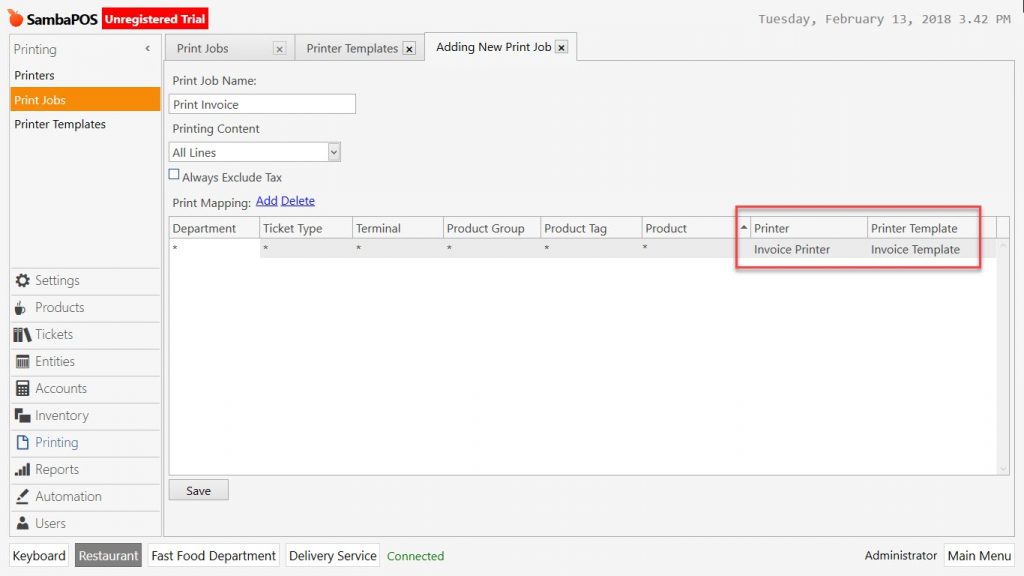
Manage > Printing > Printing Jobs from here add Print Job link. Give a proper name, select All Lines for Printing Content field and add a print mapping row. In this row select Invoice Printer, Invoice Template and then click on Save button.
5- Print Bill Automation Command
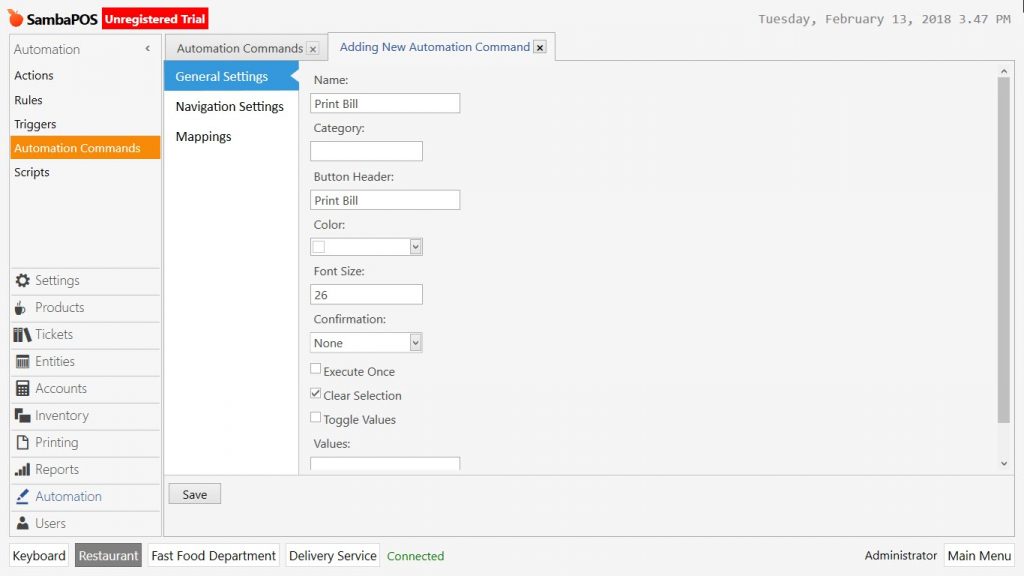
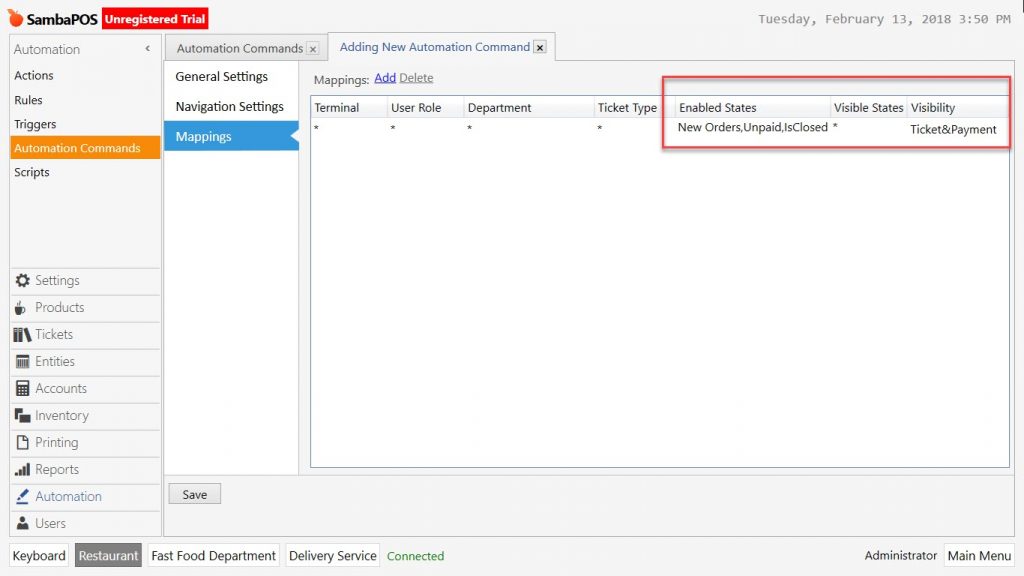
Go to Manage > Automation > Automation Commands from here add an Automation Command.
6-Print Bill Job Action
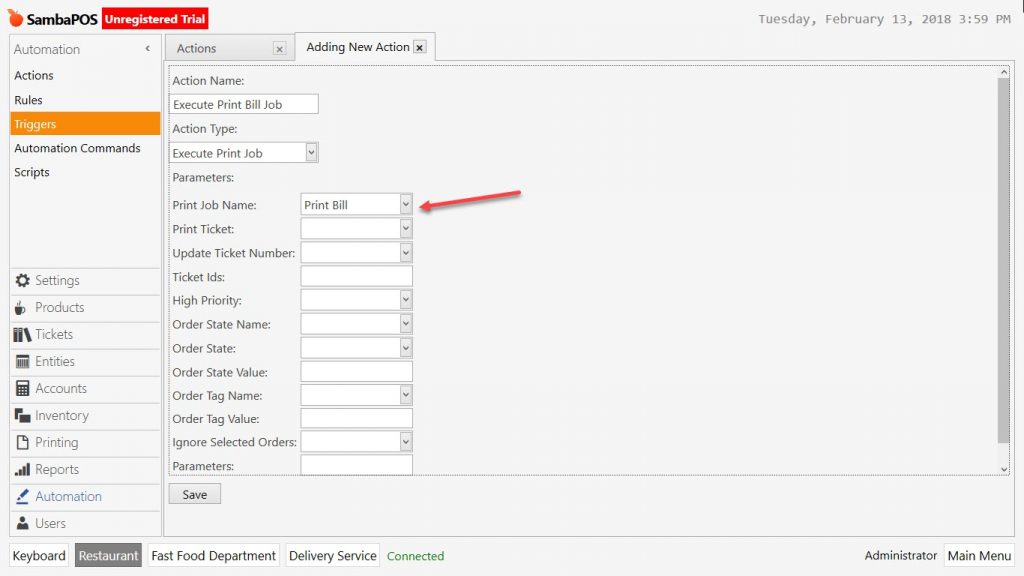
Manage > Automation > Actions from here click on Add Action link.
Action Name: Execute Print Bill Job
Action Type: Execute Printing Job
Parameters:
Print Job Name: Print Bill
7- Invoice Printing Rule
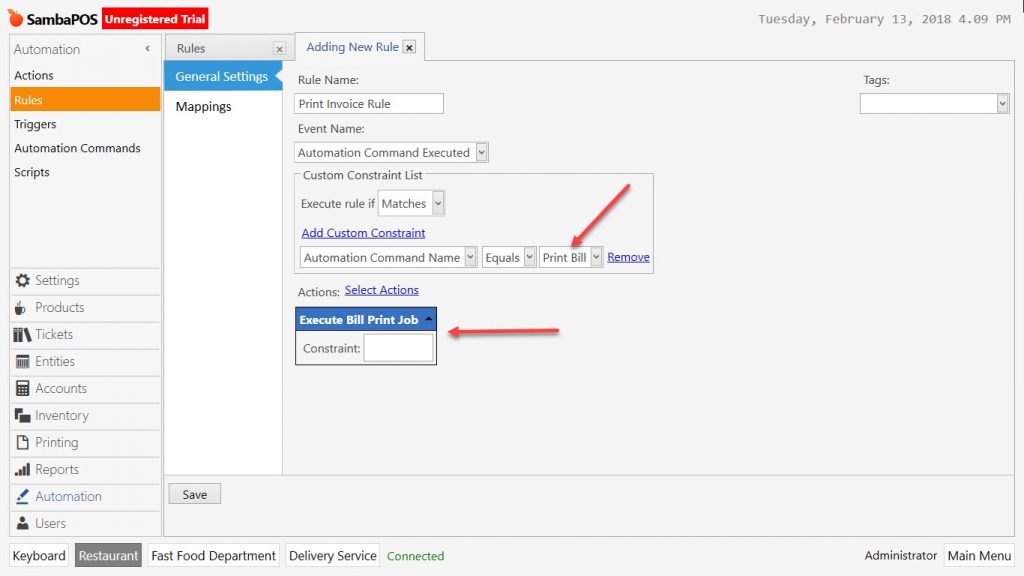
Manage > Automation > Rules from here Add New Rule link.
Rule Name: Print Invoice Rule
Action Name: Automation Command Executed
Add Custom Constraint
Automation Command | Equals | Print Bill
Select Action:
Execute Bill Print Job